Evaluating camera options for a HAB flight for capturing photo and video
November 01, 2023
When I first started thinking about what I wanted in my balloon payload, the camera didn’t make the cut. I was far more interested in the GPS and LoRa tracking equipment. As time went on I had a re-think, and am now convinced that there’s no point sending up a balloon without a camera. This post will briefly list camera options I considered, and go a little more in depth on the solutions I experimented with.
Image source: a wonderful creation by Dall-E
This post contains
My end goal
Ultimately I’m working to a specific outcome. I want a camera which can last the whole length of a flight on batteries, let’s say 18 hours to be generous. The camera should be facing out of the side of the payload, and take an image capture every 30 seconds. Each picture should be saved to an SD card which I can retrieve after the flight. An additional goal is to capture video, however this requires an additional camera, which is explained more later.
There are considerations for using cameras with a HAB project like this:
- Battery life - cameras are on the higher end of battery usage compared to low power components like sensors and GPS receivers. The ideal camera should be powered down or put in sleep mode between each 30 second interval shot to conserve the most power.
- Picture quality - the quality is going to be limited by the cost, size, and a load of other things. I don’t need the quality to be incredible like a £2000 64 Megapixel DSLR camera, but also shouldn’t be awful. Some cost-effective middleground is ideal.
- Ease of use - some options are much more involved than others. I’m comfortable with the code side of things, so some sort of interval based program would be ideal. A suitable plug and play option (i.e. no custom software) would also work too if the requirements are met.
- Weight - a smaller and more compact camera is better for a HAB payload. Less payload weight overall will mean a faster ascent rate and therefore less ground distance travelled. I don’t want to be driving across the whole country to fetch the balloon if I can help it.
Potential options
With all this in mind, and after a lot of research, I landed on a few options for a camera that fit my use case, and that I’ll go into a little detail during this post:
- An SPI camera, controlled by a microcontroller (small module wired into an existing mocrocontroller setup)
- An action camera (like a cheap version of a GoPro)
- A Canon digital camera (as these can be reliably and suitably programmed with a custom script to take shots or record video at intervals)
Using an SPI Camera
There are loads of options for SPI cameras which tick almost all the boxes for my requirements. For example Adafruit OV5640 camera breakout (or the similar Waveshare breakout board) looked like a viable option. These are cameras attached to a small breakout board, which in turn is connected to a microcontroller via SPI connection. The problem for me is that these breakout boards seem relatively new, as shown in this YouTube video, which was only 1 month old at the time of writing. As I’m new to SPI cameras, I wanted a solution which was more widely used and therefore have better community support. There also seems to be a little more effort involved with these, as there’s no built in SD card and requires manually wiring to a microcontroller.
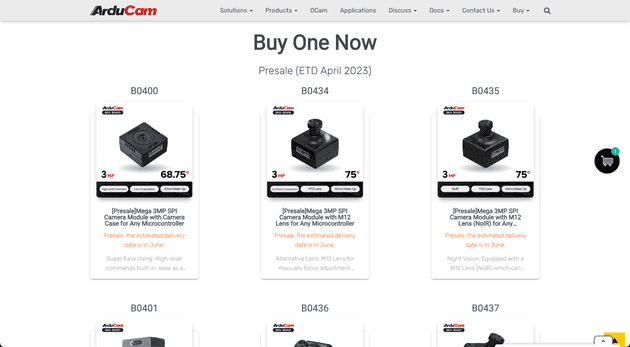
Then there’s the Arducam mega’s and mini’s, which look slick and have other built in features like night vision, but similarly they are so new that at the time of writing they actually aren’t even out yet, with delivery estimated a couple of months away:
If these were out right now, I’d probably have chosen this option, as there already seems to be a load of useful tutorials and data sheets available.
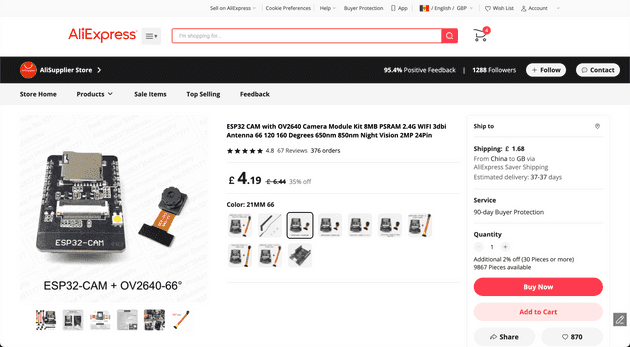
I finally landed on the “ESP32-CAM” which is low cost (£4.67 on Aliexpress), has an SD card built in, and is easily the most popular solution I could see from my research, meaning there will be good community support for all sorts of potential use cases/problems.
A bit about the ESP32 CAM
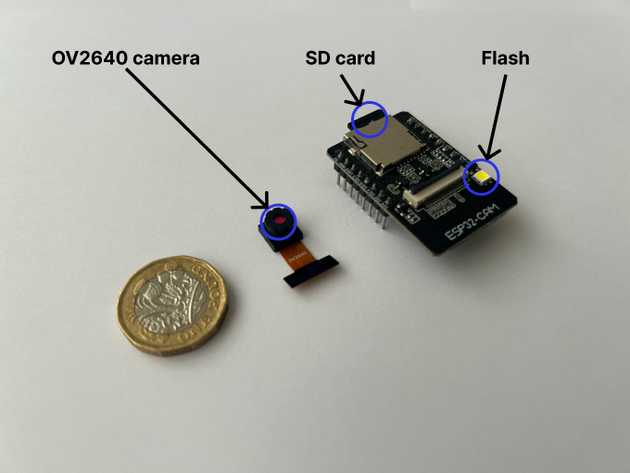
The ESP32 Cam has a built in SD card slot, a flash/LED, and a slot of a camera module:
Features:
- RAM: internal 520KB+external 4M PSRAM
- Bluetooth: Bluetooth 4.2BR/EDR and BLE standards
- Wi-Fi: 802.11 b/g/n/e/i
- Interfaces: UART, SPI, I2C
- Storage: MicroSD card
- Serial port rate: default 115200 bps
- Power consumption without flash: 180mA@5V
- Power consumption with maximum flash brightness: 310mA@5V
- Power consumption at deep-sleep: 6mA@5V
Although the board can be used for a whole bunch of things, such as taking photos and sending to another “main” ESP32, my focus is just power the ESP32 CAM so it can perform it’s own functions and run it’s own program. There will be no data transfer other than that of the board to the onboard SD card.
How to program an ESP32 CAM when it doesn’t have a USB port
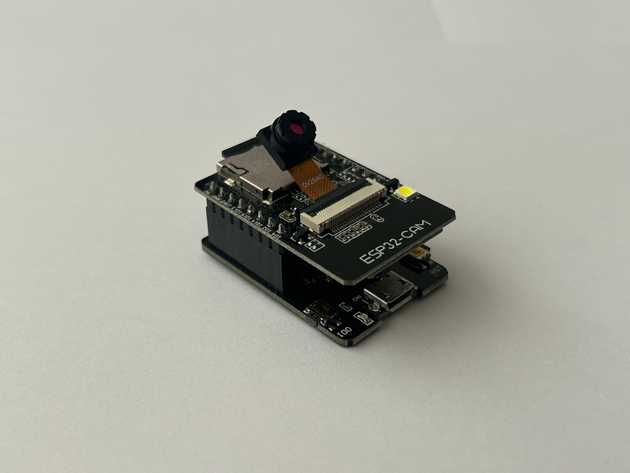
Unlike the Pico or ESP32 WROOM boards, the ESP32 Cam does NOT have a built in USB to UART bridge and onboard programmer (USB slot). This means you can’t connect it directly to a computer and load programs onto it. Instead, you must use an intermediary device to load on the program. You can use an FTDI programmer which looks like a popular option, however I found a nice shield/adapter which you can attach the ESP32 CAM which has a microUSB port:
This makes it super simple to load on a program like usual.
Different camera modules aside from the standard OV2640
Pretty much all hobbyist SPI cameras use the same group of camera modules. By far the most widely used camera module is the OV2640, because this one is supplied with the cameras which you buy from Amazon or Aliexpress:
I decided to see which other camera modules I could attach to the ESP32 CAM. There are a tonne of options as shown in the Espressif ESP32 Camera docs, however most are are hard to come by. The most popular and apparently better quality camera module than the default 2 megapixel OV2640 is called the OV5640 camera, which boasts a higher 5 megapixel resolution.
As described in this Arducam page, the ESP32 CAM can support better resolution camera’s than the standard OV2640. This great YouTube video shows the quality difference between the two camera modules.
Pictures taken on ESP32 CAM’s to show quality comparison
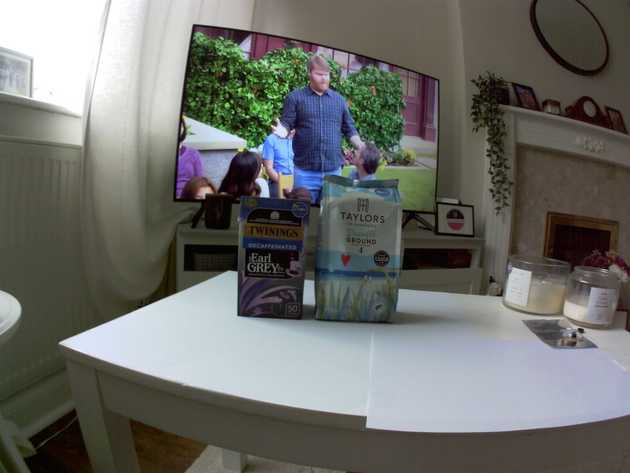
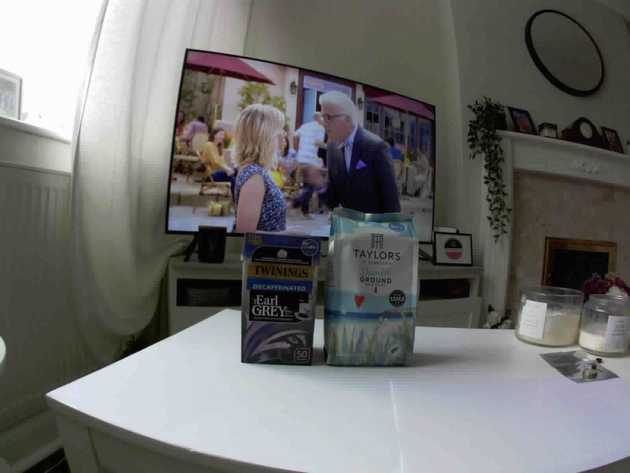
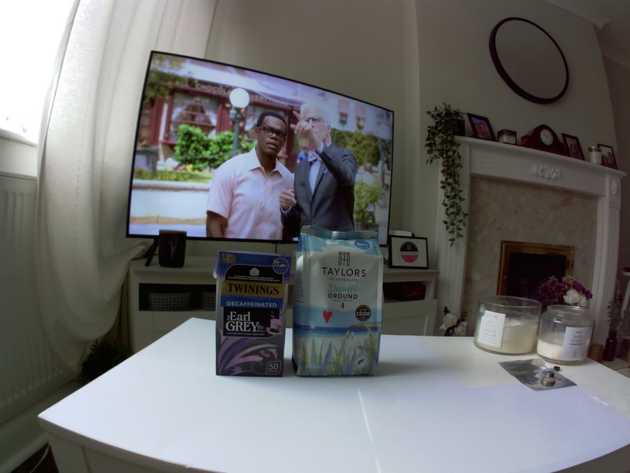
When everything was delivered, I have taken a few test shots to compare the two ESP32 CAM modules. Here’s some examples:
ESP32 CAM with OV2640 (2 megapixel)
I initially tried to get the maximum quality of a capture by setting the config as described here. The jpeg_quality option ranges from 0-63, with the lower number representing higher quality.
When setting a jpeg_quality value of 0 or 1, the device failed to capture an image at all. The highest quality I managed to set that resulted in a successful image capture was 5, so this is an image with jpeg_quality of 5:
For comparison purposes, I then captured a shot with jpeg_quality of 30:
One notable point about the image capture here is that there was a lot of blur on some of the images, even though I was not moving the camera during the capture process. I took about 10 images in total, and only 2 of them were not blurred (one of them being listed above).
As the quality was reduced from 5 to 30, the time taken to capture the image also reduced, meaning the flash was visible for around half of the time. This reduction in capture time meant there was much less blurring across all of the images taken with reduced quality.
Considering the point of the camera in my project is to take photos from a moving HAB payload, there’s a tradeoff between image resolution/sharpness and blurring that will need to be experimented with.
ESP32 CAM with OV5640 (5 megapixel)
Again I started by setting a jpeg_quality of 5:
And then for comparison, a shot with jpeg_quality of 30:
The overall image quality of the OV5640 is much better than the OV2640, as we’d expect. The OV5640 also has a wider lens, which I opted for in order to capture a wider view of the HAB flight.
One thing I noticed on these images (especially on the 5 quality one above) is that there seems to be a slight grainy feel, which looks kind of line small green vertical pattern running down the image. It’s much more clear on some early images I captured when the ESP32 CAM was connected to my MacBook by USB, with the issue being less obvious after I started powering the ESP32 CAM with a separate power bank. However, the issue is still visible. The issue is described well here, along with a few suggestions.
I ended up taking more shots with the xclk_freq_hz config option reduced from 20000000 to 5000000 (20Mhz to 5Mhz), which resulted in a better capture. So the best capture I managed to take with the OV5640 was jpeg_quality of 30 and xclk_freq_hz of 5000000:
It’s worth noting that according to the GitHub issue here, reducing
xclk_freq_hzfrom20000000to5000000meant the video frame rate was reduced too much to be usable. I am not planning to capture video using the ESP32 CAM due to battery/reliability, so this frame rate reduction may need to be considered and experimented with more for video usage.
The ESP32 CAM software
One huge benefit of using a camera module like this is that it can be attached to a microcontroller and give incredible control over how the shots are taken, the time interval, sleep mode etc., which is all handled in software. I wanted to start off simple just to confirm the camera was working, so got the most popular example working which is the ESP32 CAM Web Server.
ESP32 CAM Web Server
The widely used example is from the arduino-esp32 repo, in the ESP32 CAM examples directory. There are tonnes of guides out there to get the simple server working on Arduino IDE, but it’s a little different when using PlatformIO. To add to PlatformIO, just download/clone the repo and start a new PlatformIO project using the option “Import from Arduino Project” and select the CameraWebServer directory shown above.
For me, the example didn’t show the Serial output straight away, so I had to update my platform.ini file to:
[env:esp32cam]
platform = espressif32
board = esp32cam
framework = arduino
lib_deps =
  esp32-camera
monitor_speed = 115200
monitor_filters = send_on_enter
monitor_rts = 0
monitor_dtr = 0
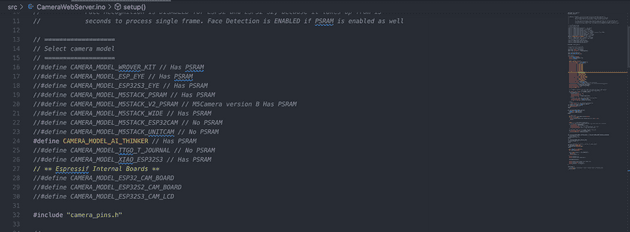
You’ll also want to leave the one board you have uncommented. I have the AI Thinker model:
Finally, don’t forget to include your WiFi router credentials just below the camera model selection. This allows the ESP32 CAM to host it’s on board program to be accessible via a web interface over the local WiFi network. When running the program you should be given a local IP address which when accessed gives you the web server UI. This is great for seeing different options and experimenting with configuration like image quality and other features.
A side note that there’s a similar ESP32 CAM web server repo which claims to have more features and better performance. I didn’t look too much into this as it’s not really my use case at the moment, but it looks good.
ESP32 CAM with periodic saving to SD card
The Web Server example above is great for an introduction and to check the camera config and quality, but for my purpose of attaching to my HAB flight, I have specific requirements, as mentioned earlier. I want to take a photo every 30 seconds and save to an SD card, with numerical incrementing file names so it’s easy to sort the photos afterwards, all whilst conserving as much power as possible.
I found a great starting point guide which has a lot of what I need. One thing I had to change was the WiFi connectivity. In the guide, the WiFi is used to get current date and time for use in the photo file names, but I’m sending this up in a balloon without a WiFi connection, so instead I will increment each photo by an integer value of 1.
My final adaption can be found here: esp32-cam-sd-capture.
Powering the ESP32 CAM
The ESP CAM board is powered from USB when developing, and could be powered with it’s own battery source when being used, but instead I’m going to power it from my main ESP32 WROOM microcontroller. Here’s a diagram:
With the 5v power output from the main ESP32 WROOM board wired to the 5v input of the ESP32 CAM, this means I only need to deal with one power source, and also it makes it easier to test and identify overall power consumption, including that of the GPS, LoRa, and other components also connected to the main microcontroller.
The good thing about powering like this is that even when the main ESP32 WROOM board is in deep sleep mode, the power still runs through to the ESP32 CAM. This means the ESP32 CAM can (and should) have it’s own power optimisation. I’ll do a separate post on ESP32 WROOM and CAM deep sleep.
Using an action camera
As mentioned earlier, the quality of the ESP32 CAM isn’t the best. One quick and easy (albeit a little more expensive) solution to get better images is to use an action camera. These are quicker and easier because there’s no option (or need) to write any code - you just use a pre-set mode and leave it running.
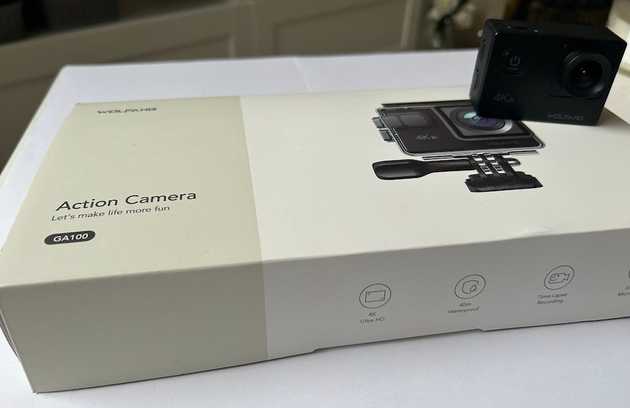
A GoPro would be the best choice, but as I might not end up retrieving the payload, I want to start with a cheaper option. I decided to use the Wolfang GA100 camera:
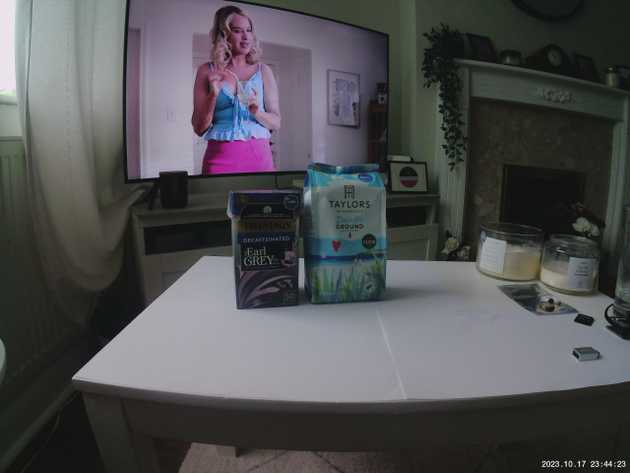
With an more impressive 20 megapixel resolution, the still images are considerably better than that of the ESP32 CAM’s OV2640 and OV5640:
Benefits of using an action camera
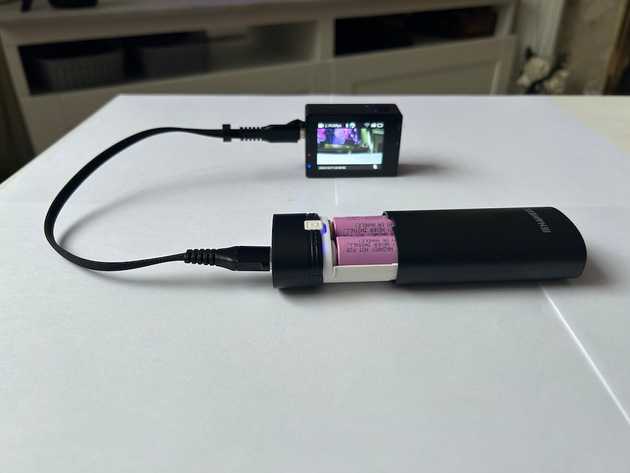
There are a few reasons why I like this camera for HAB flights. Firstly, it can take photos but can also record video, and if powered correctly, can record a video of the whole flight. The camera comes with a built in rechargable battery which is charged when the camera is plugged in to a charger using it’s micro USB slot. This built in battery alone can record for a constant 1 hour which I experienced from my own testing. This isn’t quite enough time, but I have some high capacity 18650 rechargable batteries which, when added to a battery to USB component, can provide an additional power source while in flight:
This setup gives a full 4-6 hours of constant video recording!
Another reason these cameras are great is because they have loop recording. This is critical in my opinion, as it allows video to be recorded in 1, 3 and 5 minute loops. At the end of each loop, the recording is saved and the next loop recording begins. This means that if there’s an problem with the recording at any point, or if the camera malfunctions, the previous recordings are already safe on the SD card.
Finally they make it really easy to start the recording with the use of a remote control and auto mode. The camera will likely have an intricate position when eventually added to the payload, and it will be a pain to remove it and start recording by pressing buttons on the camera before putting it back in it’s position. Instead, a remote control can be used to begin the recording just before the flight takes off.
Similarly, auto mode means that the camera will start recording video as soon as it receives power via USB. This can be useful if you set up the external battery to a wire with a switch, or simply plug the battery USB in to start the recording.
One more benefit it that they come with fish eye lenses as standard. This is useful to ensure a good field of view.
List of purchases for the action camera
Full list of components purchased for the Wolfang camera:
- Camera (£40)
- Two 18650 battery (£8.90)
- A 18650 battery charger (£5)
- A battery to USB component (£3)
Senior Engineer at Haven
